
What You Need Before You Start?
- A domain name (your store's web address)
- A WordPress hosting plan (where your store lives)
- A clear idea of what you want to sell
Starting your WooCommerce store
Step 1: Select WooCommerce Hosting
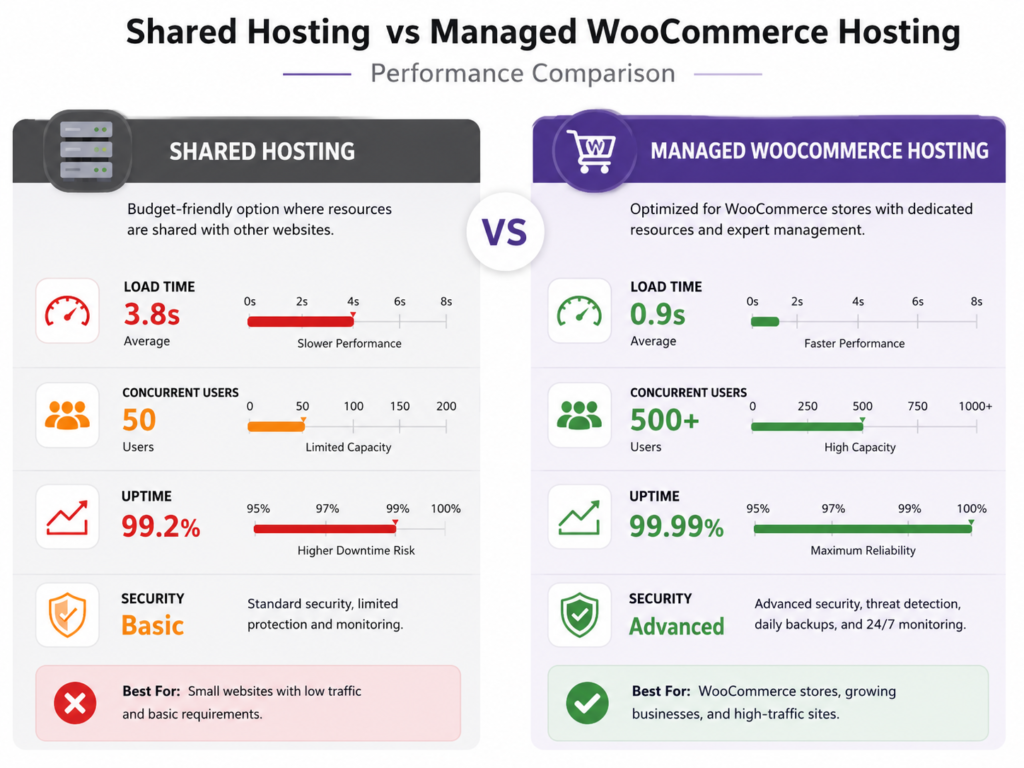
👉 Read our detailed guide: How to Choose the Best WordPress Hosting
Step 2: Register Your Domain Name
Tips for Choosing a Good Store Domain
- Keep it short — under 15 characters if possible
- Make it memorable — easy to spell and say out loud
- Use .com — still the most trusted extension for stores
- Avoid hyphens and numbers — they create confusion
- Match your brand — domain and business name should align
Step 3: Install WordPress and WooCommerce
With hosting active and domain connected, installing WordPress takes under five minutes through your hosting control panel.
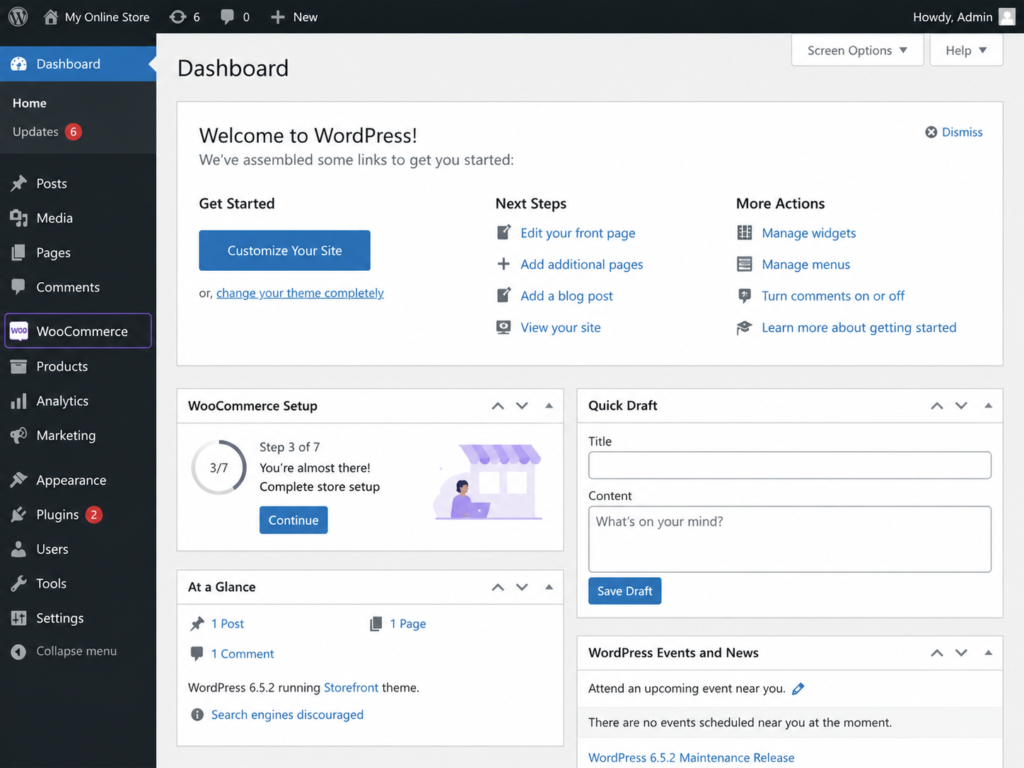
Installing WordPress
Installing WooCommerce
Completing the WooCommerce Setup Wizard
Step 4: Choose and Install a WooCommerce Theme
Choose a WooCommerce theme that is mobile responsive, fast loading, and fully WooCommerce compatible. It should have clean product layouts with clear images and add-to-cart buttons, while also being customizable to match your brand’s colors and style.
Free WooCommerce Themes Worth Considering
Storefront — WooCommerce’s official free theme. Clean, fast, and perfectly compatible. Great starting point for new stores.
Astra — Extremely lightweight and highly customizable. Works seamlessly with Elementor and WooCommerce.
Kadence — Modern design with strong performance. Free version handles most store needs comfortably.
👉 Need help choosing? Read: How to Choose the Perfect WordPress Theme for Your Business
Step 5: Add Your Products
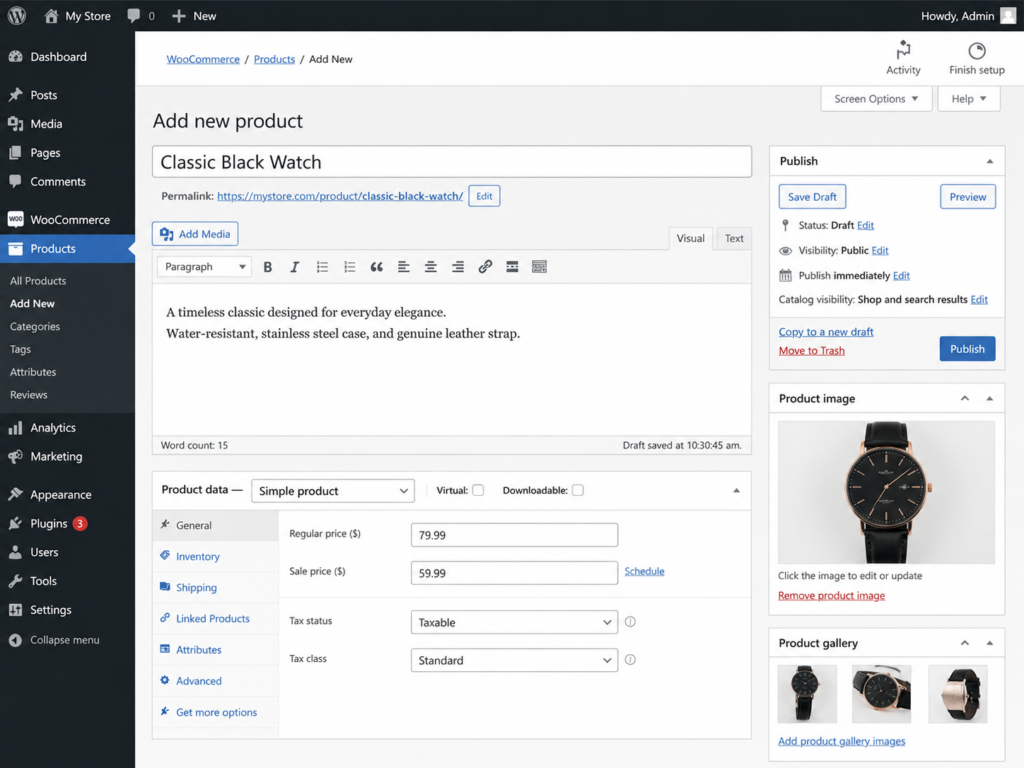
To add a simple product in WooCommerce, go to Products → Add New in your WordPress dashboard. Enter a clear Product Name, write a unique Product Description, and add a short description highlighting key benefits. Set the regular or sale price, upload optimized product images, and organize products using categories and tags for better navigation and SEO.
Step 6: Set Up Payment Gateways
Built-In WooCommerce Payment Options
WooCommerce includes these options out of the box:
- Direct Bank Transfer — customer pays manually via bank
- Cash on Delivery — payment at delivery
- Check Payments — physical check (rarely used for online stores)
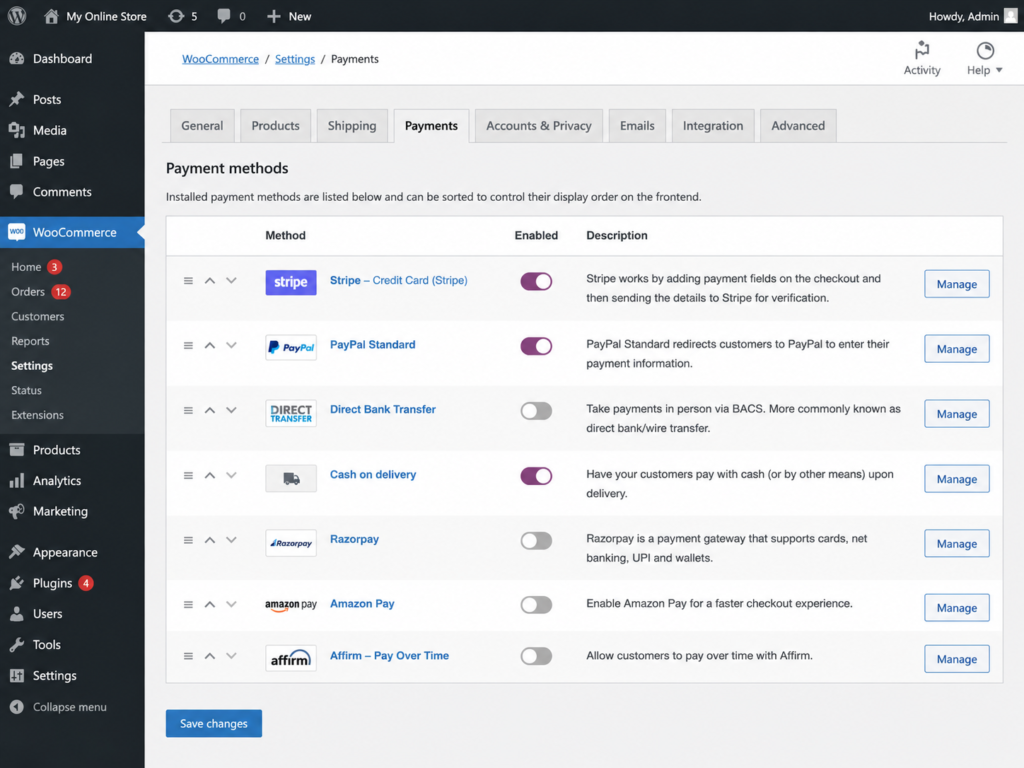
Razorpay — The most popular gateway for Indian stores. Supports UPI, net banking, credit cards, debit cards, and EMI in one integration. Furthermore, setup is straightforward with a dedicated WooCommerce plugin available free from the WordPress plugin directory.
PayU — Strong coverage of Indian payment methods with competitive transaction fees. Moreover, PayU works well for high-volume stores with negotiated rates.
Cashfree — Newer option with fast settlement times and clean API integration.
PayPal — Best for international customers. Add PayPal alongside a local gateway to cover both domestic and global buyers.
SSL Is Mandatory for Payments
Every payment gateway requires HTTPS. Without SSL, payment gateways refuse to process transactions and customers see security warnings.
👉 Read our complete guide: Do You Need SSL for Your WordPress Website?
Step 7: Configure Shipping Settings
Step 8: Install Essential WooCommerce Plugins
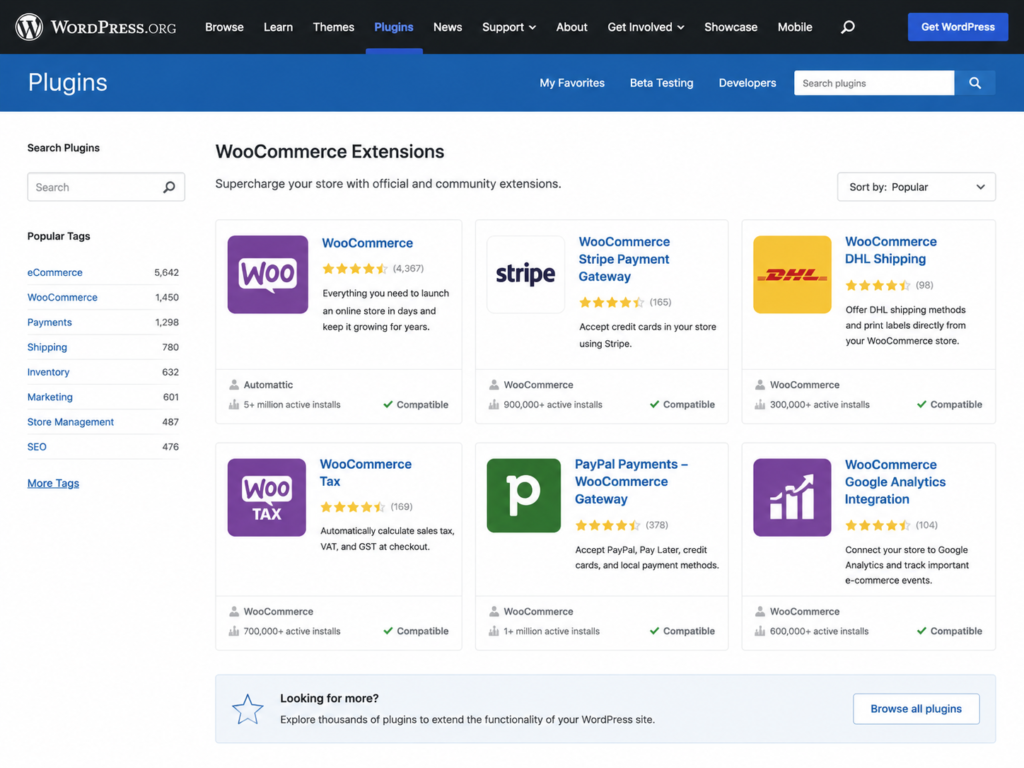
Security Plugin
Wordfence or Sucuri — Protects your store from brute force attacks, malware scanning, and firewall protection. Furthermore, a security plugin protects your customer data and business reputation.
Backup Plugin
UpdraftPlus — Automated daily backups sent to cloud storage. Consequently, complete store recovery is possible after any server issue, hack, or accidental deletion.
SEO Plugin
Rank Math or Yoast SEO — Optimizes product pages, generates XML sitemaps, and manages meta titles and descriptions across your entire store.
👉 Complete setup guide: How to Install and Set Up Rank Math SEO
Performance Plugin
WP Rocket or W3 Total Cache — Caching, minification, and lazy loading for faster store page speeds.
Contact Form Plugin
Contact Form 7 or WPForms — Customer inquiry forms for product questions, returns, and support requests.
👉 Learn more: How to Use Contact Form 7
Step 9: Optimize Your Store for SEO
SEO brings customers to your store without paying for every click. A well-optimized WooCommerce store attracts consistent organic traffic that grows over time.
Step 10: Launch and Start Marketing Your Store
Immediate Launch Actions
Submit to Google Search Console — Add your store URL and submit your XML sitemap. Consequently, Google begins crawling and indexing your products within days.
Connect Google Analytics — Install GA4 to track visitor behavior, traffic sources, and conversion rates from your very first visitor.
Set Up Google Shopping — Free Google Shopping listings appear in product search results and drive high-intent traffic from buyers actively looking for what you sell.
Content Marketing for Organic Growth
Social Media and Email Marketing
Build an email list from day one using a newsletter opt-in on your store. Email marketing delivers the highest ROI of any digital marketing channel for e-commerce. Furthermore, social media platforms — especially Instagram and Pinterest for visual products — drive discovery traffic that converts to store visitors.
WooCommerce Store Cost Breakdown
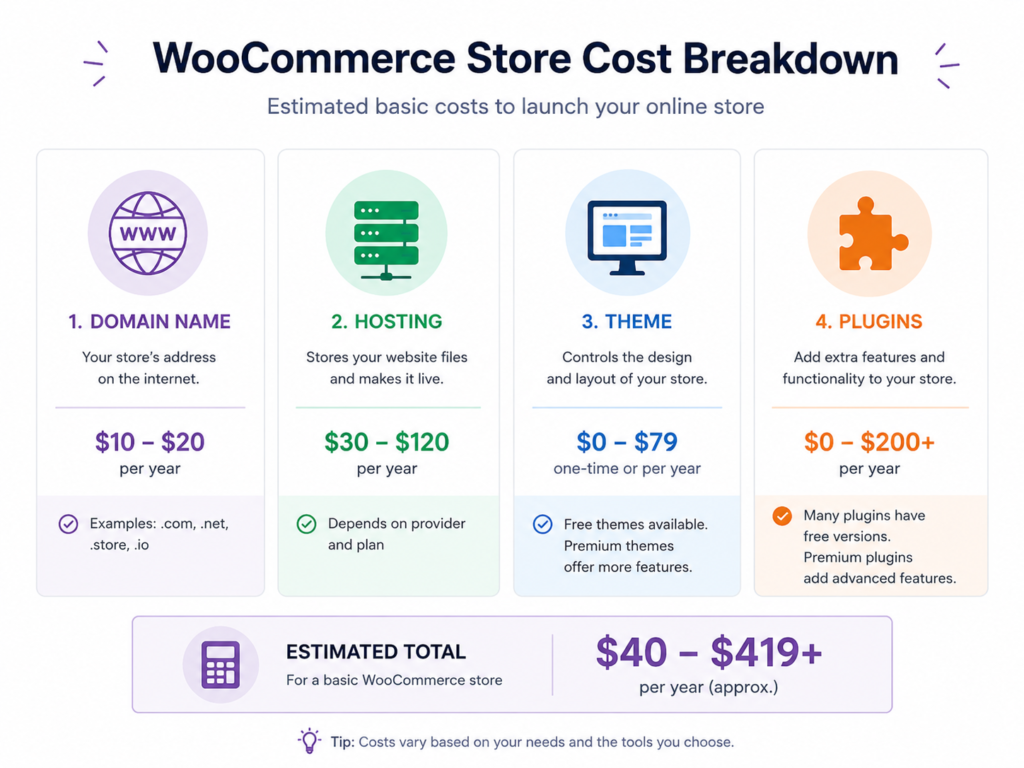
| Item | Estimated Cost |
|---|---|
| Domain Name | ₹800 – ₹1,500 / year |
| WordPress Hosting | ₹2,500 – ₹25,000 / year |
| WooCommerce Plugin | Free |
| WordPress Theme | Free – ₹8,000 (one-time) |
| Essential Plugins | ₹5,000 – ₹20,000 / year |
| SSL Certificate | Free (most hosts) |
| Payment Gateway | Per-transaction fee |
| Total (Basic Store) | ₹10,000 – ₹30,000 / year |
👉 Full breakdown: WordPress Website Cost: An Actual WordPress Price in 2026
Conclusion
Therefore, start with Step 1 today. Your online store is closer to launch than you think.
Frequently Asked Questions (FAQs)
Is WooCommerce free?
Yes — WooCommerce itself is completely free. You pay for hosting, domain, and any premium plugins or extensions you choose to add.